Updated on 1/21/2025
What is Deno Deploy: A Review of Deployment Features
 MK
MKMarvel Ken-Anele
Feature |  Deno Deploy Deno Deploy | |
|---|---|---|
Infrastructure What runs under-the-hood. | N/A | |
Continuous Integration & Continuous Delivery (CI/CD) | ||
Continuous deployment Imagine an automatic update system for your website. This feature automatically deploys any changes you make to your code (usually from Git) to your live website. | N/A | |
Automated builds from Git An easy integration with popular Git repository hostings like Github, GitLab and Bitbucket. | ||
Instant rollbacks to any version Easy way to promote any previous build to production without the need to revert commits or data changes. | ||
Site previews for every push New build with a unique URL for every commit and pull request. | ||
Compatible with all Static Site Generators | ||
Notifications Events triggered on successful, canceled, or failed build. | Email | |
Team Management Create team account and invite your teammates to the project. | ||
Custom domains Bring your own domain and connect to the project. | ||
Automatic HTTPS SSL certificate generated automatically. | ||
Rewrites & Redirects HTTP 301 or 302 redirects from one URL to another. Rewrites work similar to reverse proxy and allow to send user to different URL without modifying the original URL. | ||
Password Protection An easy way to restrict access to the website for users who don't have password. Useful if you work on a new site and want to keep it in secret. | ||
Skew Protection Skew Protection ensures client and server versions stay synchronized during deployments, preventing compatibility issues. | ||
Free Tier | ||
Websites Number of projects you can have in Free Tier on one account. | N/A | |
Build Minutes The amount of time your build scripts can run per month. | N/A | |
Concurrent builds How many builds can be run at the same time? | N/A | |
Bandwidth The amount of data that is transferred to or from the CDN. | 100GB /month | |
Team Members The number of users (team members) that can be added to the CMS. | N/A | |
Build Time Per Deployment Build have to finish within the limited time. If not it will fail due to timeout. | N/A | |
Build Memory Limit (in MiB) The amount of memory that is allocated by system to build process. Some operations like image processing are expensive and might require more memory. For Node.js it is max-old-space-size setting. | N/A | |
Paid Plans | ||
Max team members before switch to custom pricing | 7 | |
Git contributors have to be Team Members In order to triger build, Git contributor has to be a paid team member. | ||
Serverless | ||
Serverless Functions (API) Small pieces of code that run on-demand without managing servers, typically used for API endpoints. | Deno runtime | |
Edge Functions Serverless functions that run closer to the user, reducing latency and improving performance. | Uses deno runtime | |
Background Functions Code that runs in the background on the platform to perform tasks that don't require immediate user interaction. | run up to 15 minutes | |
CRON Jobs Schedule tasks to run automatically at specific times or intervals. Useful for automating repetitive website maintenance tasks. | ||
Developer Experience | ||
CLI Command Line Interface tools that allow developers to perform tasks and manage the tool via the command line. | deno deploy | |
Extensions Additional plugins or add-ons that can enhance the functionality of the platform. | Integrations | |
Environment Variables Secret configuration settings for your website that change based on where it's deployed (dev, staging, production). | ||
Build Logs Track the progress and results of website builds for troubleshooting | ||
Build Canceling Ability to stop a build process that is currently running. This frees up resources and lets you make changes to your website faster by stopping builds you don't need anymore. | Web UI | |
Platform Built-in Products | ||
Analytics Tools for tracking and analyzing website traffic. | Basic analytics built-in, potential for external integrations | |
Authentication Services for managing user logins and authentication. | ||
Database Managed database services. | N/A | |
Asset Optimizations Tools for optimizing images, CSS, JS, etc. | ||
A/B Testing Lets you test different versions of your site by directing traffic to each variant, helping you optimize user experience based on performance metrics. | ||
Form Handling Services for managing form submissions. | ||
Data Storage Solutions for storing and managing data. | Built-in KV (key-value) storage for simple data persistence | |
Push Notifications This allows your website to send real-time alerts or updates to visitors who have opted-in. | ||
Machine Learning | ||
Security & Compliance Offerings | ||
Two-factor authentication Adds an extra layer of security when logging in. | ||
Team Logs Tracks user activity within the platform for better accountability. | ||
SOC2 Service Organization Control 2 compliance for managing customer data. | SOC2 Type 1 | |
ISO27001 International standard for information security management. | ||
GDPR Compliance with the General Data Protection Regulation for handling personal data. | ||
Sustainability | ||
Carbon Neutral | ||
Carbon-free Energy | Not clear policy | |
Integrations | ||
Integrations Connecting your deployment platform with external services like headless content, commerce, databases, and more. | ||
Custom build-system integrations Allows you to connect your own build tools and processes with the deployment platform. | ||
Support with self-hosted instances of git | ||
API mesh API Mesh allows you to combine multiple APIs into a single unified API, simplifying data fetching and integration across different services and backends. | ||
Deploy Preview feedback integrations Enables team members and stakeholders to comment directly on preview deployments. | Extensive integrations | |
Edge Functions integrations | Specific to platform features | |
High Performance Build Memory and CPU | Variable, depends on plan / provider | |
Native Build Plugins | ||
What is Deno Deploy
Deno Deploy, launched 24th March, 2021, serves as a worldwide platform for serverless JavaScript applications, ensuring that your JavaScript, TypeScript, and WebAssembly code operates on managed servers located near your users. This setup enables quick response times and low latency. Instead of virtual machines, applications are powered by the Deno runtime and run on efficient V8 engines, making the deployment process fast and lightweight.
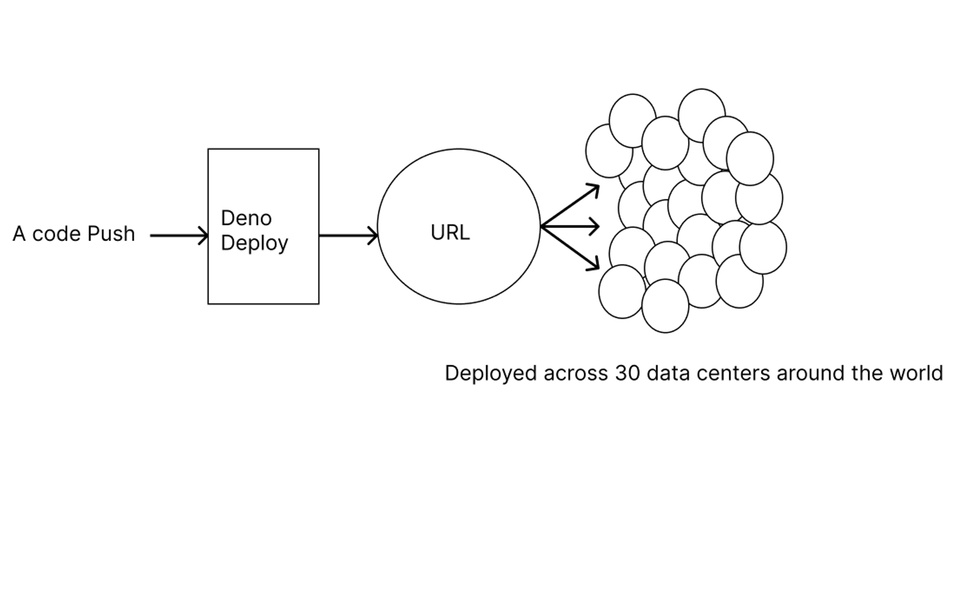
A visual representation of Deno Deploy.
Pricing
As of the time of writing, Deno Deploy offers two pricing models. The standard model for hosting your first-party projects, and the subdomain for hosting third-party API.
Free Tier
For users exploring the platform with low traffic, the Free Tier provides a cost-free option. This tier comes with basic features, making it an ideal starting point for those looking to familiarize themselves with the platform. It includes monthly limits of 1 million requests, 100GB of bandwidth, and allows up to 50 custom domains per organization.
Pro for Standard
Introducing the Pro plan at $20/month, designed to meet the demands of advanced projects, this tier offers subdomains, up to 50ms CPU time per request, and 5 million requests per month, accompanied by 250 GB of included data transfer. Perfect for multiple-user collaboration, this plan ensures large project management and development.
Builder Tier for subdomain
Designed for startups and small to medium-sized businesses experiencing growing usage demands, the Builder Tier is priced at $200 per month. It offers increased resource quotas with monthly limits of 20 million requests and 300GB of bandwidth. Users can scale their projects effectively with additional resources available at $2 per million requests and $0.50 per additional gigabyte of bandwidth.
Enterprise Tier
Tailored for platforms requiring optimal security, support, and performance at an enterprise level, the Enterprise Tier offers a customized pricing model. This tier is designed for large-scale applications with specific and potentially higher resource requirements. Users interested in the Enterprise plan are encouraged to reach out to the service provider directly to discuss their unique needs and obtain a personalized quote.
Please feel free to visit the pricing page, and take advantage of the great features Deno Deploy offers.
Limitations
The free tier of both the Standard and Sub-hosting model of the service imposes certain limitations on the support and service level offerings. Users on the free tier do not have access to email support, potentially limiting their ability to seek direct assistance for any issues or queries. Also, an Email Support SLA is not provided, indicating that users may not benefit from a guaranteed response time or resolution commitment when using the free tier.
Onboarding support, which is important for assisting users in the initial setup and orientation phase, is not included in the free tier. This means users would need to rely on documentation and community resources without the direct guidance and support typically offered during the onboarding process.
Features of Deno Deploy
Deno Deploy upholds the following claims in its features:
- the fastest, easiest way to deploy server-side JavaScript
- built-in APIs for persistence, and queues
- supports millions of modules from Node js and np
- securely run untrusted JavaScript or TypeScript code in the cloud.
Deno Deploy dashboard
Deno Deploy dashboard is the definition of simplicity, and it is easy to navigate.
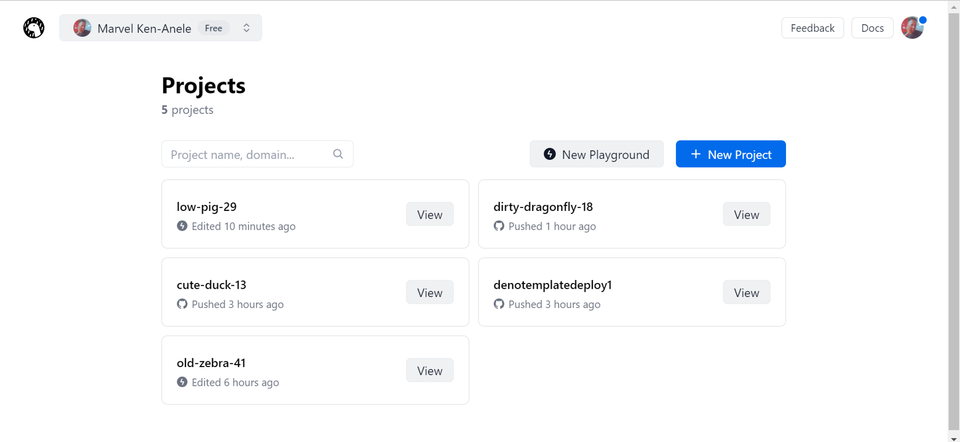
Project section
This section provides an overview of all deployed projects.
Search bar
Positioned under the project header, the search bar is a handy tool for quickly finding specific projects, which is especially useful when managing a large number of deployments.
New Playground button
The “New Playground” button is designed for online testing of deployments. This feature allows users to experiment with deploying applications in a test environment. It is discussed in detail later in the article.
New Project button
The “New Project” button is used to initiate the creation of new projects. This is where users can set up and configure their applications and deploy them.
Profile, docs, and feedback
At the top right corner, there are links to access user profile settings, documentation, and a feedback mechanism. This provides users with quick access to their account information, official documentation, and a channel to provide feedback or report issues.
Options for starting
There are four different starting options available, each capable of leading to a successful deployment. It’s important to understand that each option holds its significance and steps to deploy. we will explore all the possible starter options available.
Start with a template
Deno Deploy provides various templates for different use cases and web frameworks that you can use as a starting point for your projects. You may want to deploy a starter web application with pre-built templates, using any of Deno’s supported web frameworks.
To do this, we will first log into the Deno Deploy Dashboard where we will be given the option to authenticate with Github.
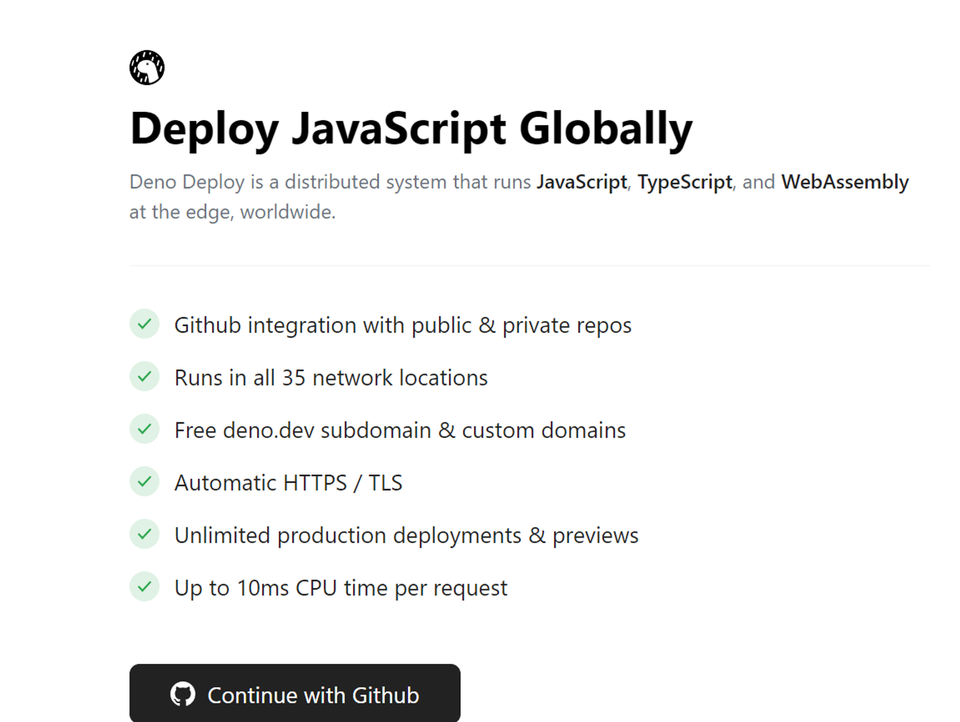
Authorize Deno and automatically the Dashboard below comes up. Go ahead and select “New project” button.

For the sake of this article, we will be using Fresh. Fill in your chosen name or let the algorithm suggest one for you, and click Create&Deploy button.
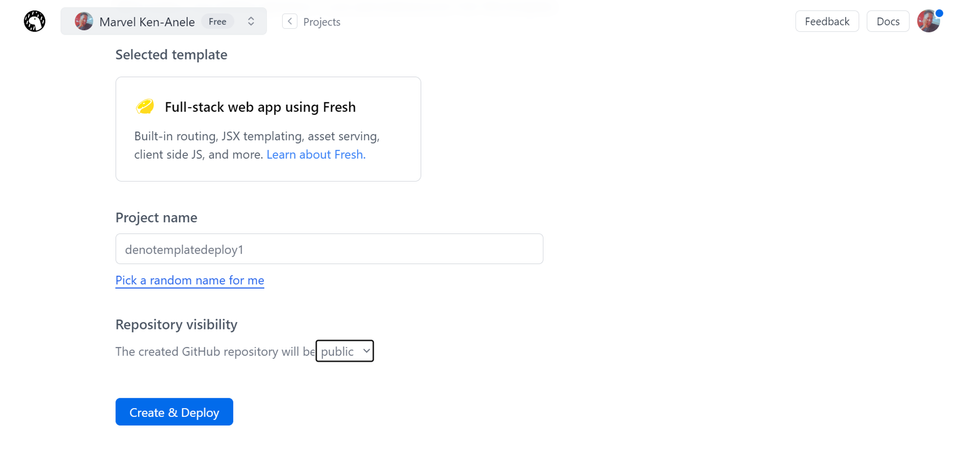
This runs:
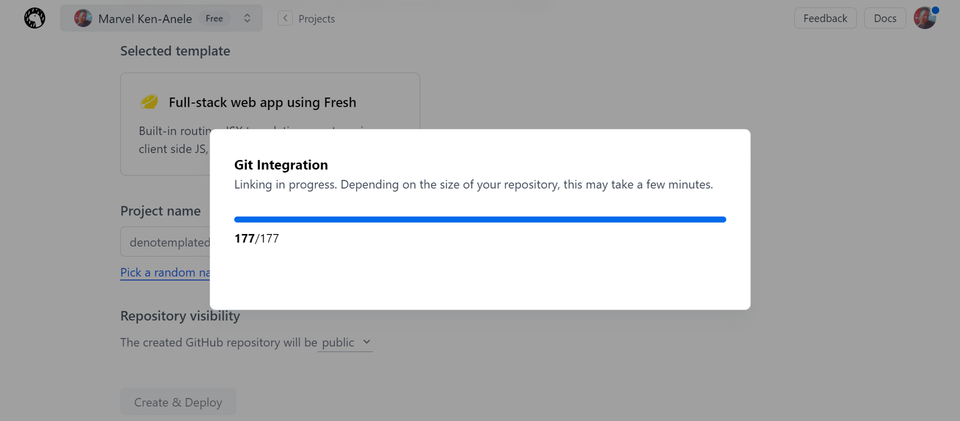
At this point we should have this dashboard displayed.
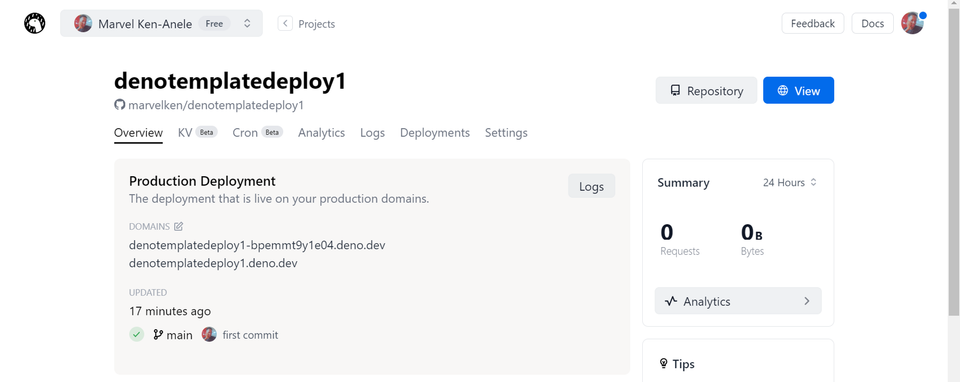
To view the deployed template, click on the repository at the top right corner of the Deno Deploy Dashboard, leading you to the associated Git repository. Create a folder of your choice on your computer, navigate into it, and clone the Git repository. Run the Deno project locally with the deno run tasks command in your terminal.
The local server should start, usually at http://localhost:8000/. Open this address in your browser to witness the page’s functionality.
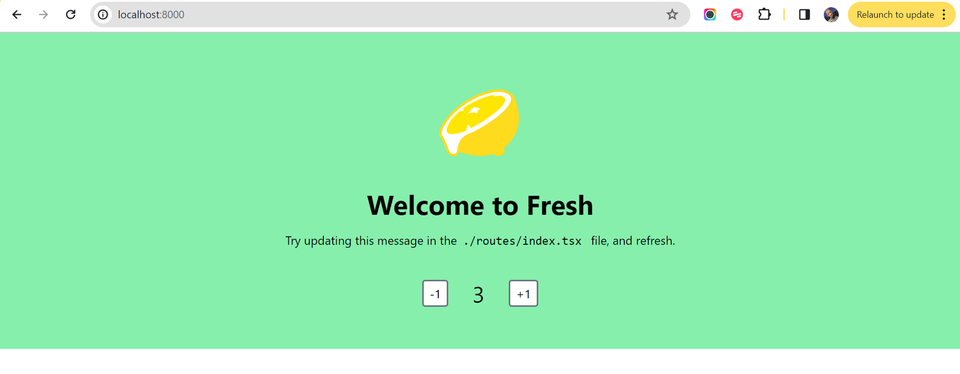
To assess the speed of Deno Deploy, let’s make some adjustments to the starter code displayed on our Deno Deploy site. Navigate to index.tsx component, where we will replace the whole code below:
import { useSignal } from "@preact/signals";
import Counter from "../islands/Counter.tsx";

// Define the base64-encoded image as a constant
const logoBase64 = "data:image/jpeg;base64,/9j/4AAQSkZJRgABAQAAAQ...";  // Replace with your actual base64 data

export default function Home() {
  const count = useSignal(3);
  return (
    <div class="px-4 py-8 mx-auto bg-royal-red">
      <div class="max-w-screen-md mx-auto flex flex-col items-center justify-center">
        {/* Use the base64-encoded image as the background */}
        <div
          class="my-6"
          style={{
            backgroundImage: `url(${logoBase64})`,
            width: "128px",
            height: "128px",
            backgroundSize: "cover",
            backgroundRepeat: "no-repeat",
          }}
          alt="the Fresh logo: a sliced lemon dripping with juice"
        ></div>
        <h1 class="text-4xl font-bold">Welcome to Bejamas Deno Deploy Article</h1>
        <p class="my-4">
          Going Further we will Deploy this application
          <code class="mx-2">./routes/index.tsx</code> file, and refresh.
        </p>
        <Counter count={count} />
      </div>
    </div>
  );
}
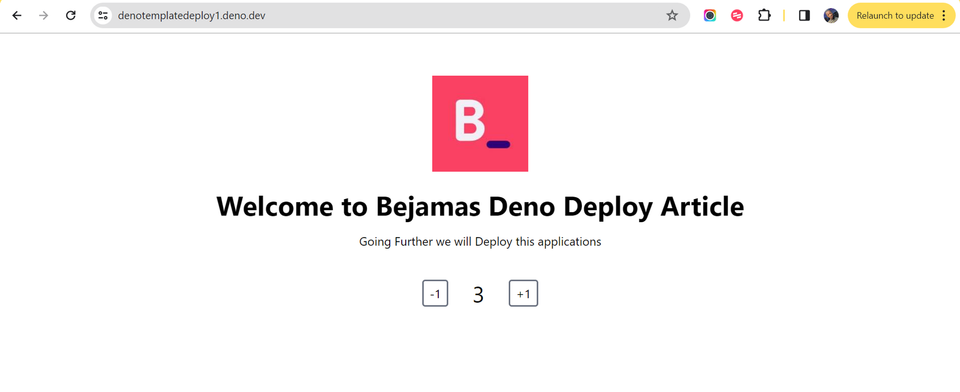
After making these tweaks, we should have this:
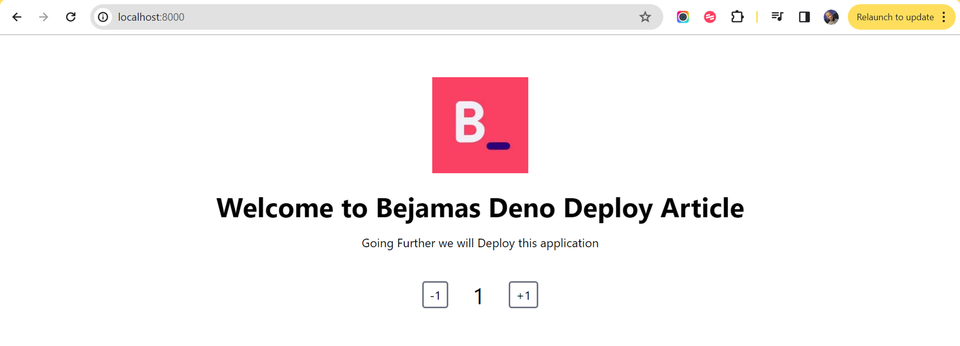
We can then push the modified code to the Git repository. In our case it is marvelken/denotemplatedeploy1. Observe how fast Deno Deploy updates and reflects these changes in the deployed application. From my perspective, it is fast.
Start with an existing app
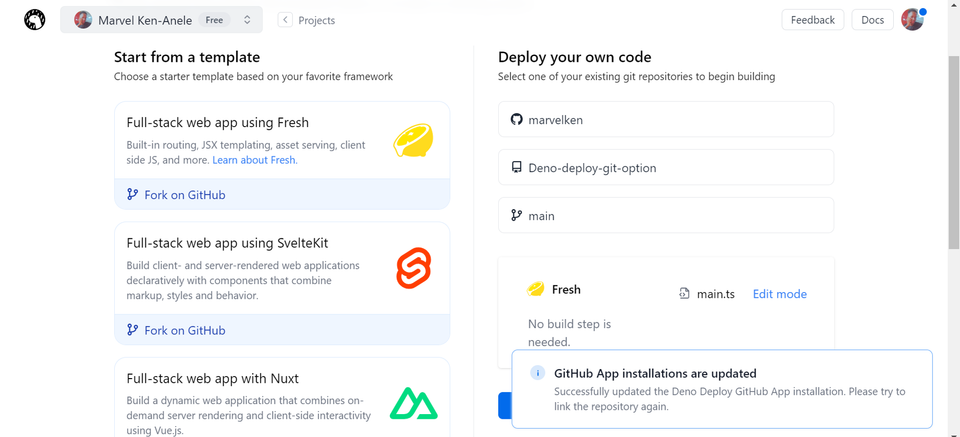
If you already have a Deno app, you can deploy it directly to Deno Deploy. Ensure that your app is compatible with the Deno Deploy environment. To do this, we can quickly create a simple app and push it to GitHub. Afterwards, we navigate to our Deno-Deploy dashboard, create a new project, and select a Git repository of your choice:
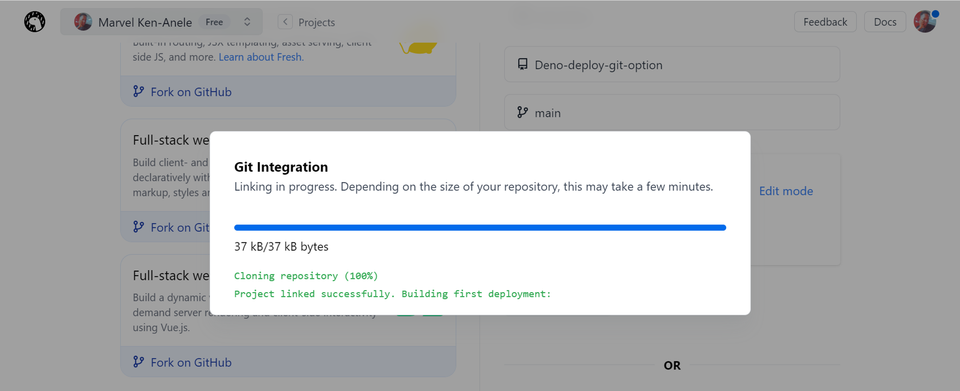
Now you can deploy easily. Wait for it completely integrate the repo completely:
When it’s done,
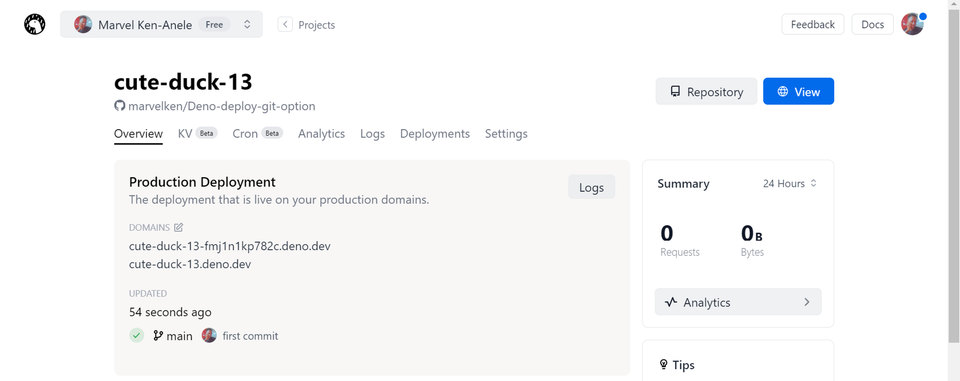
click any of the domains, and your application should be up and running.
Start with a playground
A playground is a dynamic, browser-based editor that allows you to write and execute JavaScript code instantly. This interactive environment allows you to experiment, test, and refine your JavaScript code within the confines of your web browser.
Deno Deploy has a playground feature where you can experiment with Deno code and see the results instantly. It’s useful for testing and learning Deno features.
After authorization, select New Playground below.
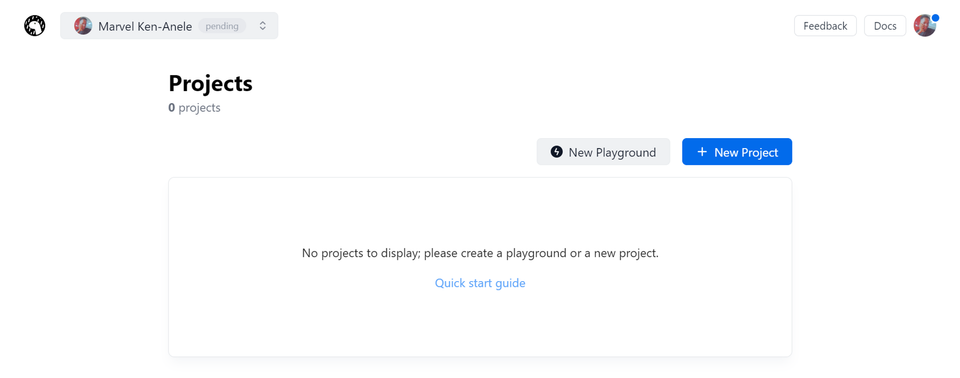
Select the New Playground, and the page opens as below.
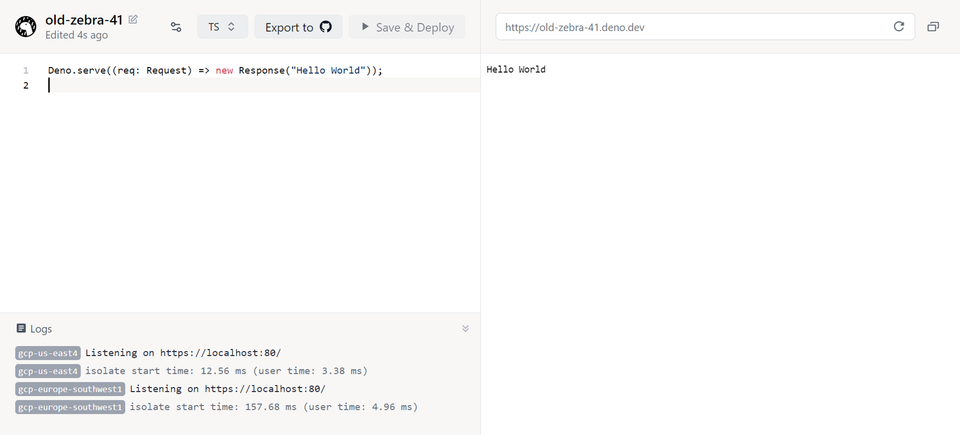
Make a simple edit to it, and click “Save & Deploy”.

Just like that, we have our application deployed.
Start from scratch
If you prefer, you can start building your Deno application from scratch without using any templates or existing code.
The installation process is as follows:
Install the Deno runtime and deployctl utility.
If you do not have Deno installed already, feel free to follow the detailed steps in this article.
Install deployctl:
deno install --allow-net --unstable https://deno.com/deploy/deployctl.tsWrite and test a Deno program.
Create a simple Deno program, for example, a counter server. Save the following code in a file named server.ts:
// counter.ts
import { Application, Router } from "https://deno.land/x/oak/mod.ts";
const app = new Application();
const router = new Router();
let count = 0;
router.get("/", (context) => {
  context.response.body = `Counter: ${count}`;
});
router.get("/increment", (context) => {
  count++;
  context.response.body = `Counter incremented! Current count: ${count}`;
});
router.get("/decrement", (context) => {
  count--;
  context.response.body = `Counter decremented! Current count: ${count}`;
});
app.use(router.routes());
app.use(router.allowedMethods());
console.log("Server is running at http://localhost:8080/");
await app.listen({ port: 8080 });
Test your program locally by running:
deno run --allow-net app.tsOpen your browser and navigate to http://localhost:8080/.
Deployment
Navigate to the Deno Deploy Dashboard. Create a new project, and you should find an option towards the bottom right of the page to “create a blank project.” Choose this option as we will need this project to complete our deployment process.

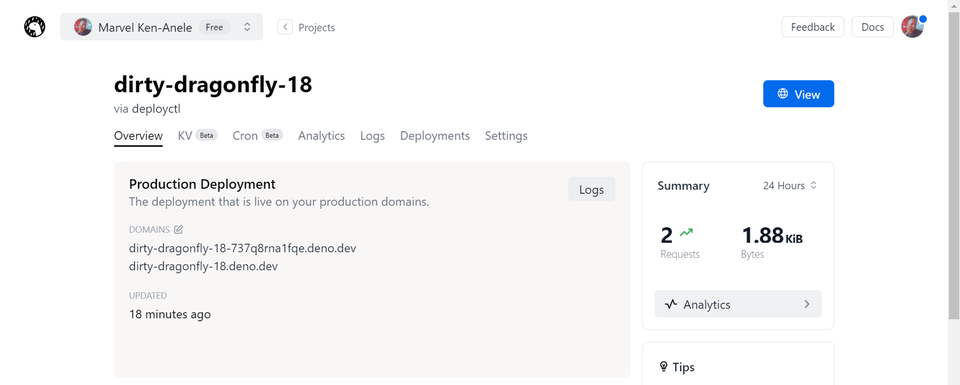
After creating the project, make sure to take note of the name that is generated for you. You will need this project name when deploying from the command line, in hpw case the name is dirty-dragonfly-18. This project name serves as a unique identifier for your deployed application on Deno Deploy. Keep it handy for future deployment.

To use deployctl to control your Deno Deploy account from the command line, you’ll need an access token. Follow the detailed steps below in order to get this token:
- Using this link you are able to navigate appropriately to a section where you can manage access tokens. Look for an option like “New Access Token.”
- Click on “New Access Token.” Provide a name for the token when prompted.
- Copy the generated access token to a secure location on your computer as you will need it later.
- Open your terminal or command prompt.
- Export the access token as a system environment variable using the following command:
Replace your_access_token with the actual access token you copied. If you are using Windows Command Prompt, use:
set DENO_DEPLOY_TOKEN=your_access_tokenIf you are using PowerShell, use:
$env:DENO_DEPLOY_TOKEN = 'your_access_token'And if you are using Mac/Linux os:
export DENO_DEPLOY_TOKEN=your_access_token_hereNow, your Deno Deploy access token is set as an environment variable and can be used by deployctl for deployment operations. Keep this token secure, and do not share it publicly.
At this point, you’ve set up your project and obtained an access token. You’re now prepared to deploy your application. In the directory where your server.ts file is located, execute the following command:
deployctl deploy --project=your_project_name --prod server.tsAfter a short period, your counter server will be deployed globally.
Brief difference between Deno and the others
Deno Deploy enables users to upload their code, generating a globally deployed server with a provided URL. Leveraging the V8 engine, it executes code swiftly. Deno offers various APIs to enhance this workflow.
One such API is the Broadcast Channel. This feature facilitates secure communication between different browser tabs. Tabs with the same origin can securely exchange messages using this API. In Deno, the Broadcast Channel API extends this capability to communicate between instances rather than tabs.
Another valuable API is the TCP Connections. It allows for connections to databases like MongoDB, MySQL, or Redis over the internet, all within the V8 execution environment. Unlike some popular serverless services, Deno’s capabilities include support for this functionality.
Deno Supports NPM
Deno Deploy has now introduced native support for running npm modules through npm specifiers. This is great news for developers who want to host Node.js apps at the edge without the need for build steps. The ability to leverage npm modules directly can simplify the development and deployment process.
This enhancement allows developers to host Node.js apps at the edge using npm modules, eliminating the need for additional build steps. To illustrate this, let’s go ahead and deploy some functions using the playground:
import express from "npm:express@4";

const app = express();
// Register a route
app.get("/", (req, res) => {
  res.send("Hello Bejamas!");
});
// Add a new route
app.get("/greeting", (req, res) => {
  res.send("Greetings from Bejamas!");
});
// Run the server!
app.listen(3000);
The code snippet above demonstrates a simple Express app. It begins by importing the Express module from npm using the “express@4” specifier. The application is then set up with two routes: one for the root path (“/”) responding with “Hello Bejamas!” and another for “/greeting” responding with “Greetings from Bejamas!”. This is what we get when this /greeting runs:

Conclusion
Deno Deploy is a solid solution for developers seeking a fast, secure, and easy-to-use platform for deploying serverless JavaScript applications. Its features, pricing flexibility, and support for various deployment scenarios make it a compelling choice in the serverless world. It is evolving, and with hopes it can approach perfection someday.
 AWS Amplify
 Azure Static Web Apps
 Begin
Begin Cloudflare Pages
 Digital Ocean App Platform
 Firebase
 GitHub Pages
 Heroku
 Kinsta
 Layer0
 Netlify
 Render
 Vercel